
Our ad codes perfectly blend in the ad zones you have available on your website.
The first step to getting ads shown on your site or in your app is to create ad zones. At the end of this step by step guide, you will get an ad zone code that you can implement on your website in order to start displaying ads.
This article explains how to create an ad zone for your website(s).
Before you begin
Learn about the different advertising types and understand your ad zone settings so you know how to create an ad zone.
Next steps
- Choose your Ad zone settings.
- Choose your Ad zone properties settings.
- Copy and paste your ad zone code.
Choose your ad zone settings.
Instructions
Sign in to your EroAdvertising’s account.
If you have an EroAdvertising’s account but haven’t created an ad zone in your account yet, click the ad zones tab then proceed to the next step.
Click the New Ad zone button.
In your basic ad zone settings, give your ad zone a name.
Note: This field is only editable when a new ad zone is selected.
Start to select one of your website(s) which you want to use for your ad zone(s).
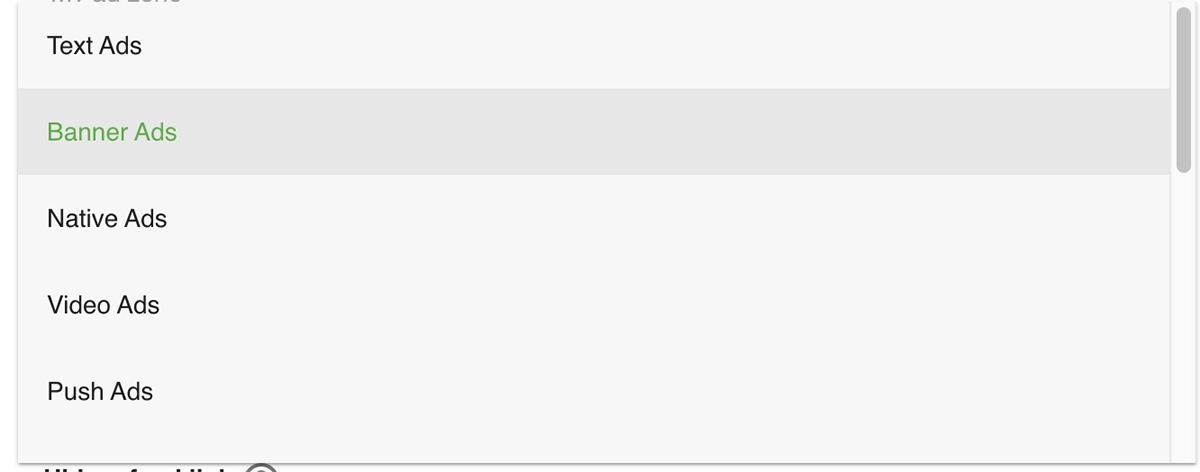
From the drop-down menu, select the advertising method type you want to use. Most publishers use “banner ads” (recommended to generate high earnings), ” pop ads,” or “redirect ads”, though other advertising types are available.
Note: advertising types cannot be changed once the ad zone has been created.
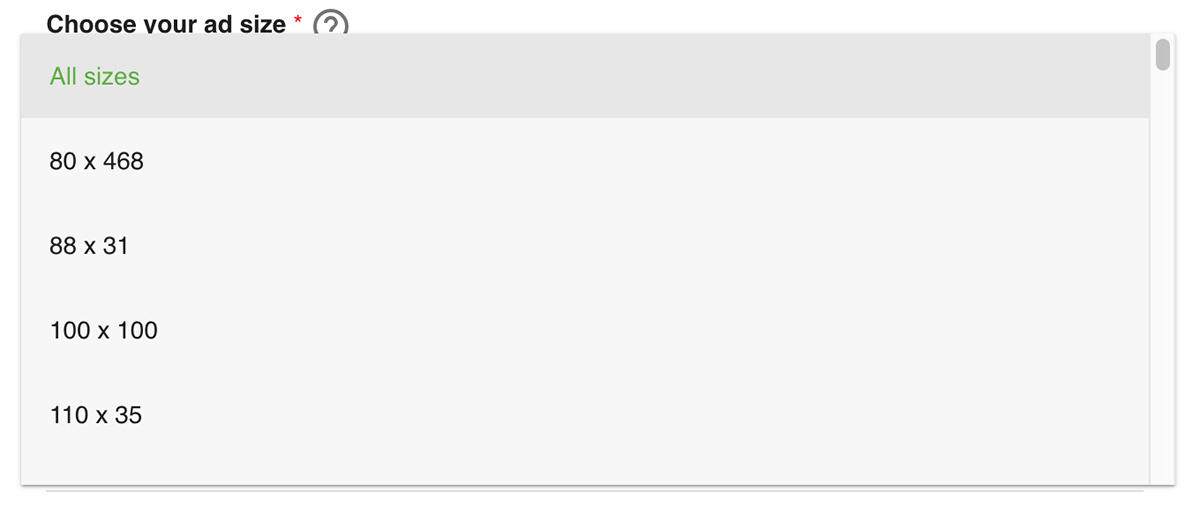
Select the banner size you want to use. Most publishers use “300×250” (recommended to generate high earnings), though other banner sizes are available. Banner sizes can be changed once the ad zone has been created.
Select the rating type you want to use. Most publishers use “soft-core” or “hardcore” which is recommended to generate high volumes of traffic. Learn more about choosing your rating type.

From the drop-down menu, select a category filter you want to use.
From the drop-down menu, select a blacklist filter. Learn more about choosing your blacklist filter.
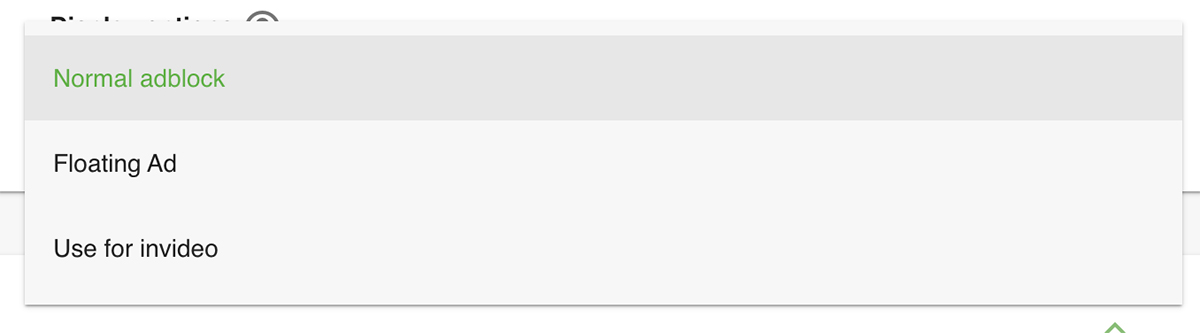
Check the boxes next to the display options types that you’d like to target.
Choose your “Advertisement colors” (optional), choose custom colors that can help users identify the ad zone easily. If you don’t have a color group, don’t worry, the system will automatically generate one for you.
Choose your ad zone properties settings.
Instructions
Turn the switches on of the ad zone properties you want to disable. Learn more about our ad properties.
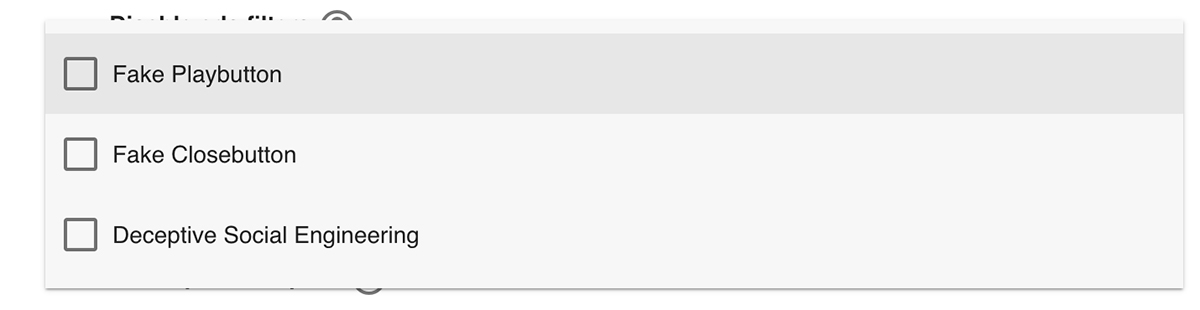
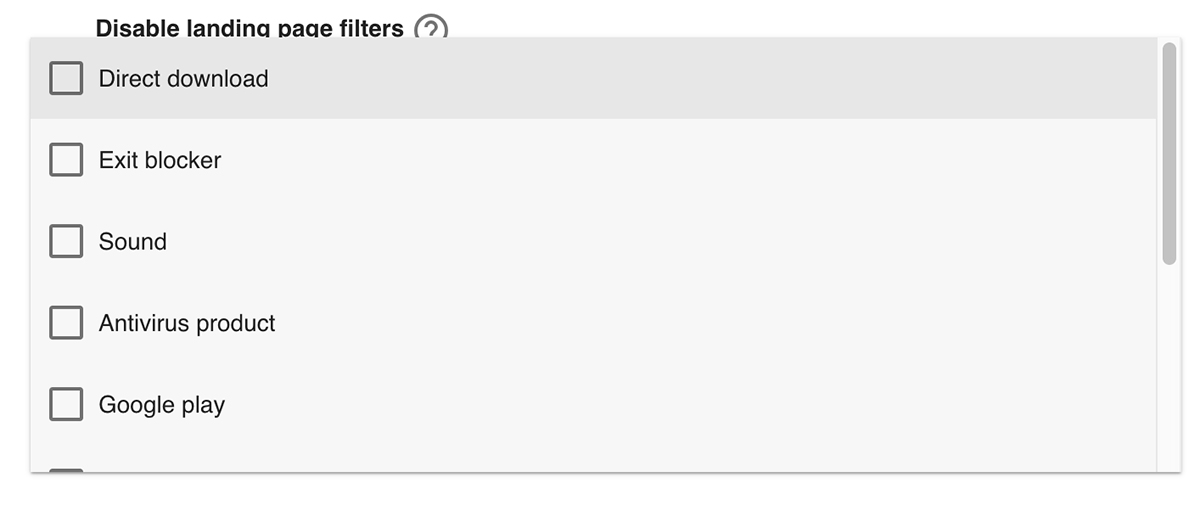
From the drop-down menu, check the boxes next to the landing page filters that you’d like to disable. Learn more about our landing page filters.
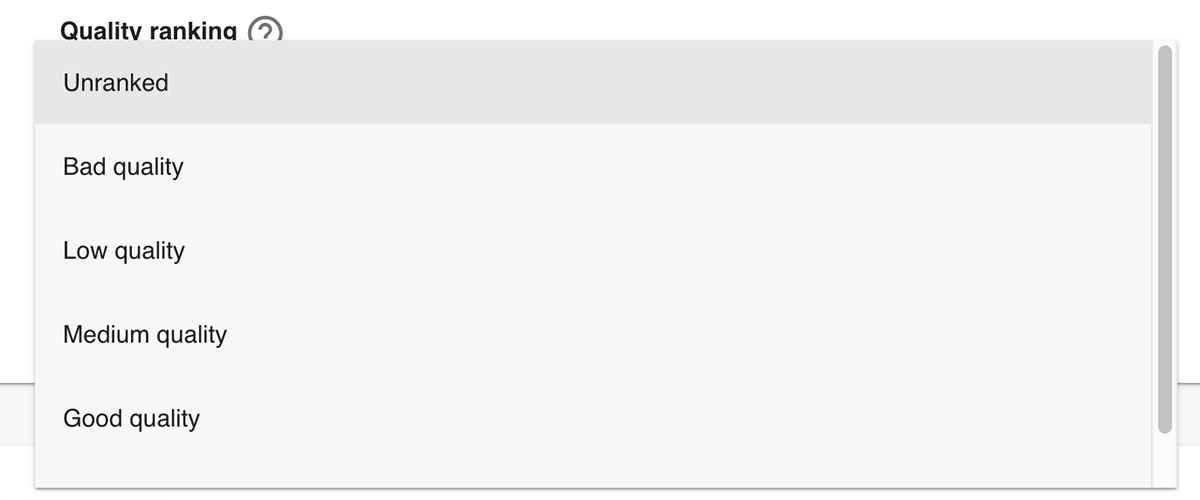
Select the quality ranking of your ad zone traffic.
Add a brief description to provide a short bio or description of your ad zone.
Copy your ad zone code.
Great. You are almost done. All that remains is to copy & paste your ad code on your website.
Note: the information in this section can be highly technical in nature so you may want to ask somebody technical to implement the instructions.
That said, you have two integration options:
IFrame Integration
This is the most common option for integrating websites with EroAdvertising. In the most simple case, all you need to do is:
Instructions
- Go to the Publishers > Ad zones > (Ad zone Overview) page.
- Click on the edit section.
- Copy and paste the IFRAME code on your website.
eaCTRL Integration
This code will auto-create and load our eaCtrl. This means that you can use all our newest techniques, without you have to install it on your server.
Instructions
- Go to the Publishers > Ad zones > (Ad zone Overview) page.
- Click on the edit section.
- Copy and paste the eaCTRL code on your website.
Click Save and continue. You can copy and paste your ad zone code at any time.
Have additional questions? Reach out to our friendly support team at support@eroadvertising.com


